Saturday, April 25, 2015


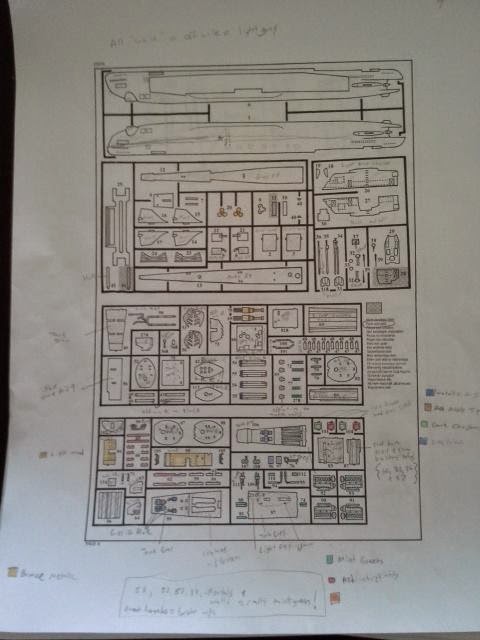
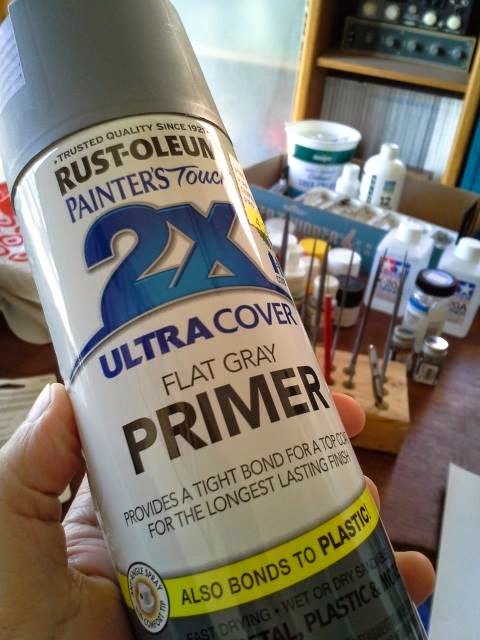
I will be building a Revell of Germany model submarine (and YES: the above photo is my finished work). Because I live in the USA and have to order this kit on Amazon through a vendor in the UK I'll have plenty of time to prepare. I haven't built a model like this in decades so I have to get paint, blades, putty, etc.

Here's a video of the finished sub:


Revell Germany Submarine kit 1/144 scale Wilhelm Bauer. Kit arrived 1/30/2015.


Revell Germany Submarine kit 1/144 scale Wilhelm Bauer. Kit arrived 1/30/2015. The model is cut-away so it will look just like the picture on the box: interior visible!


No way is it getting that leopard paint job: it will be primed, then black paint applied in boxes all over it running over the 'weld' seams, then it gets a faint two-tone grey paint job that let's a bit of the black lines show through. 

Other people paint grey, then take a mechanical pencil and run it in the weld grooves to differentiate all the different metal panels that make up the hull.


Parts, instruction book and decals.


Lot's of tiny decals. This entire decal card is only about 4" x 5" in size.

After ordering the model, but before it arrived I printed the instruction book off the internet, along with some other source materials so I could get a feel for the model.


These are the instructions I printed off the internet. I took colored pencils and colored in the paint colors I wanted to use. This submarine in real life had three lives with three different paint jobs (four if you include the garish colors on the model's box). 

Version 1: U-2540 was completed a few months before the end of WWII and was presumably painted in shades of grey. It was scuttled (sunk on purpose) at the end of the war.

Version 2: In 1957 the Federal German Government raised U-2540 and totally refurbished it, and then named it The Wilhelm Bauer. Wilhelm Bauer, pronounced "Vill-helm Bow-air" was like the Henry Ford of submarines. It was fitted with all sorts of new electronics and mechanical devices for testing purposes--along with new paint color schemes. It was used by the government until the 1980s when it smacked into a Destroyer battleship (the Z-3). That's when it was retired by the government yet again.

Version 3: A private museum bought the submarine and put most of the things back to the grey WWII version, but some things are still very colorful. You can go to Germany and actually walk around on this very submarine.

Version 4: the Revell Germany box and instructions call for some *very* bright colors that don't seem to exist. Looking at tourist photos the current engines look a very pale mint green, not the bright green or almost neon green from the Revell box or instructions. I will make the engines pale-mint green. Other items on the boat I *will* go with the brighter color scheme, such as the "Christmas Tree" which is a white wall with dozens upon dozens of festive green and red valves on it. It looks neat, and the phrase "Christmas Tree" appears in various literature about U-2540/Wilhelm Bauer, although I have a feeling during WWII it was a grey wall with slightly different grey valves.

Here are many tourist photos of this boat as it sits now:

https://www.flickr.com/photos/clemensv/sets/72157634948912230/with/9447795953/

http://www.landmarkscout.com/u-boat-wilhelm-bauer-type-xxi-and-u-boat-archive-museum-altenbruch-bremen/

http://www.warmuseums.nl/gal/060gal.htm

http://adjunct.diodon349.com/uboats/u2540photos/u2540_photo_album.htm

http://romaniaforum.info/board463-travelogue/board467-hanseatic-league-cities-städtehanse-lübeck-hamburg-kiel-bremen-rostock-dortmund-köln/504-bremerhaven-wilhelm-bauer-u-boot-typ-xxi-ex-u-2540-virtual-tour/

http://www.subsim.com/radioroom/showthread.php?t=207325

And schematics:
http://img387.imageshack.us/img387/9954/planxd3.jpg


Injected molded models sometimes have an oily 'mold release' agent all over them. This prevents primer, paint, glue and decals from sticking properly. This model seemed fine but I washed it in dish soap just to be sure.


164 parts are now drying and I get to feel nervous about my first submarine build. This submarine has a very high difficulty level. Most submarine models are just: glue left half to right half and paint grey. This model features a cut-away that let's you see inside to all the different interior compartments: engine rooms, battery rooms, bridge, etc.

Files. At this point my plan is to assemble each part, sand, file, putty, sand, prime, paint every single piece. This will take time to build. We'll see how long my patience lasts.


Primer: I have to paint the interior hull white, so I have to prime the hull and part #1: the rudder; but the first part you assemble doesn't get installed until the last step. So I have some leeway to decide when/how I prime. The parts are still drying from their bath so I've got time. There's no use rushing with something like this.

UPDATE: I didn't bother priming all the parts while they were on the sprue. I'm shaving each piece with an xacto blade and shaping them with fine files before gluing. Luckily I charted out my colors so I can build up pieces that will be the same color. Then fill with putty if need be and then prime.


In metro-Detroit I go to Dave's Hobby and TV (in Westland on Warren ave). They have old paints cheap, lots of old model kits, lots of train stuff, really expensive z scale trains (like $500 little engine cars) and no high tech stuff, no rc stuff, they don't even have a sign on the outside of a parking lot! Very nice staff and really great prices on paints, etc.

For more industrial items like Krylon Primer and other hardware items I recommend Duke's Hardware (Dearborn Heights, Ford Road). A *real* hardware store with tons of items and a very knowledgeable staff.

Moving wings that don't get glued here. They are supposed to get glued to half the hull now but the exact angle is unclear so I'll wait until I'm joining both halves.


Rudder. It seems simple but it has to be shaved and filed, glued together, sanded, putty filled because the edges on one side aren't flush, shaved some more, primed, painted then installed later on at the last building step.


Revell Germany 1992 mold mark. Luckily they put this one in a torpedo bay so I won't have to sand this off.


I'm wet sanding flat pieces so they're smooth.


At the top third and bottom third you can see mold depressions. They're gone now after shaving with knife and wet sanding.


Error in kit: these little rudders near the propellers have posts but they didn't make holes for them to fit into. I cut off the posts and glued the parts on.


Lots of filing to get the propellers in nice shape. Set aside to be primed and then painted metallic bronze later. The instructions say to attach them now, but then there would be no way to prime and paint it nicely. When you're taking care with every part there are a lot of traps like that.


Disregard the instructions and glue the two top decks together. That way the hull is only top, left and right pieces.


The fill holes in the mold hit a few of the vent holes in the visible cutaway side of the sub. Filled them with putty. A few less holes but a much smoother look.


Two halves of hull RUBBERBANDED together, not glued. This makes it easier to glue the top deck two the back half of the hull: not the front facing side of the hull with the cutaway. After a while the rubberbands will be removed and the cutaway half of hull will be removed. Skipped over attaching ladders to the deck since the ladder might get painted green and the deck will be grey.


Looking into the cutaway. The deck is glued to ONLY the back half of the hull, the cutaway is just there to help hold it straight while it dries.

Torpedo tubes!


What fun are portals and bulk head doors that are flat and closed? I'm gluing mine wide open, held open by tooth picks while they dry.


All these parts are ending up different colors so they get primed and painted separately and then glued to other stuff. Primer takes a week to fully dry.